Showing posts with label DIY. Show all posts

Monday, November 21, 2011

Helpful Household Hints – Floss for Fixing Pet Toys

Everyone has their own household tips and tricks that they’ve picked up over the years. Well, I have a few tricks up my sleeve too and I’m continuing my little series of Helpful Household Hints to share them with you.

Helpful Household Hint #3: Floss for Fixing Pet Toys

Even with a pup as calm as mine, pet toys only last so long. Carrying your beloved toys around in your sharp little teeth and the occasional games of tug, eventually will cause a bit of wear and tear.

Instead of going out and buying a whole new batch of toys, try salvaging what you have. I’m sure your pup will be thankful to have his/her favorite toy around as long as possible.

patient pup

First, sift through that toy bucket and determine what is salvageable and what is not. Some toys may just have too many holes.

To fix that beloved stuffed animal you will need to know how to do a basic hidden stitch (here’s a YouTube video I found if you need some extra sewing help). Next, you will need some sewing utensils: a needle with a fairly big hole on the end and floss.

Now you might be wondering, “floss?!?!” The reason I use floss is the reason for today’s helpful hint. Floss lasts a lot longer when it comes to fixing stuffed animals. Personally, I’d rather mend my dog’s toys less often, wouldn’t you?

To get started, I cut off a long length of floss (probably about double the length of my arm) and thread it through the needle. Pull it through only to the halfway point of the floss. Then take both ends of the floss, hold them evenly and tie them in a thick knot. Now not only do you have the thickness of floss, but you have DOUBLE the thickness of floss.

Find one end of the hole you want to fix and thread the needle up towards you through the inside of the stuffed animal. Your knot should hold on the inside and be hidden. Continue the stitch throughout the length of the hole. I usually go back up the length of the stitched hole again for added reinforcement.

Wha-lah! Fixing your pet’s toys is as easy as that.

Feel free to send me any questions that you might have about this helpful hint. As I was writing, I was starting to feel like a video almost would be necessary to fully explain the process. But if you are an expert sewer, just the idea of using floss should be enough for you.

Credit: Photo taken and edited by me. Video via expertvillage on YouTube.

Thursday, August 11, 2011

Craft Envy

I wish I had the kind of DIY talent it would take to make this light fixture.

IMAG0031

This amazing wine bottle creation hangs in the We Olive & Wine Bar at The OC Mart MIX.

If you live in Orange County CA, I strongly recommend you check them out (especially on a Thursday for $1 Taco and $5 Sangria night from 6pm-8pm or on a Saturday for the SoCo Farmers’ Market complete with food trucks and live music from 9am-2pm). Fun times!

Credit: Light fixture found at We Olive & Wine Bar at The OC Mart MIX. Photo taken by me.

signature5

Tuesday, August 9, 2011

Nut & Berry Granola

{Homemade Nut & Berry Granola}

I’ve been on a granola kick lately. It happened on a recent trip to Trader Joe’s when I spotted some yummy Pecan Praline Granola. From that point on, it was all history and I’ve been eating and craving granola ever since.

trader joe s pecan praline granola

{Trader Joe’s Pecan Praline Granola}

Last week, my friend Jessica whipped up a batch of her favorite granola recipe and it did not disappoint. In fact, I liked it so much that this weekend I made my own personal batch.

And because we were attending a dinner party that same evening, I was able to package some in a pretty canister and bring it as a homemade hostess gift.

Now on to the recipe!

NUT & BERRY GRANOLA

Ingredients:

  • 3 cups of Rolled Oats
  • 2/3 cup Raw Slice Almonds
  • 2/3 cup Roasted Unsalted Cashews
  • 2/3 cup California Walnut Baking Pieces
  • 3/4 cup Shredded Sweet Coconut
  • 1/4 cup + 2 tablespoons Brown Sugar
  • 1/4 cup + 2 tablespoons Maple Syrup
  • 1/4 cup Vegetable Oil
  • 3/4 teaspoon Salt
  • 1 cup Dried Cranberries

Instructions:

  1. PREHEAT your oven to 250 degrees.
  2. MIX oats, nuts, coconut, and brown sugar in a large bowl.
  3. MIX syrup, oil, and salt in a small bowl.
  4. COMBINE dry and wet ingredients thoroughly.
  5. SPREAD mixture on a large ungreased rimmed baking sheet.
  6. BAKE for 1 hour and 15 minutes stirring with a spatula at 15 minute intervals.
  7. ADD dried cranberries for the last 15 minute interval.
  8. COOL, then package and eat!

*I added a little more coconut after the granola cooled just because I like coconut and wanted a bit more.

{See all the nuts, cranberries, and coconut? Yum!}

Credit: Recipe adapted from my friend Jessica’s adaptation of Alton Brown’s Granola recipe on Food Network. Granola pictured was made by me. Photos taken by me as well.

signature5

Thursday, August 4, 2011

Fun with Color.

The goal of Idée Inc. is to make images searchable by developing advancing image identification and visual search software. These are the amazing minds that created TinEye. If you are not familiar with TinEye, it is a reverse image search engine. This means you can submit an image to TinEye to find out where it came from and where it is being used. Pretty much, it is like a Google image search, but you input a picture instead of text. Ah-mazing.

Now Idée has created something called Multicolr Search Lab and it’s an amazing color tool that’s really great for creating color theme boards. It’s as simple as clicking on color swatches and Multicolr Search Lab pulls various Flickr images that contain your chosen colors.

Here are some examples of color boards I’m made using the program:

Multicolr Search Lab   Idée Inc.2

 Multicolr Search Lab   Idée Inc.4

 Multicolr Search Lab   Idée Inc.6

Multicolr Search Lab   Idée Inc.5

I can see this free tool really coming in handy for creating color palettes and harmonious color schemes. Give it a try. And have fun!

Credit: Idée Inc. Images above created by me using Multicolr Search Lab.

signature5

Wednesday, August 3, 2011

My Last 5 Pins…

Is anyone else on Pinterest? It’s one of my addictions. I’ve worked my way up to 41 Pinterest boards and 8,367 pins.

Now if you are not familiar with Pinterest, it’s basically a site where you can bookmark (a) things you love, (b) things you want to come back to, and (c) things others bookmark. Except, the bookmarks are called pins, and the pins are images attached to links. So you can clearly see what it is you’ve pinned without having to visit the URLs to refresh your memory. It’s pretty great. Especially for a “list girl” like me.

On top of all that, it’s a social community where you can gain followers who can re-pin and comment on your pins.

Check out my last 5 pins…

It’s weird. I’m normally not a big fan of wedges. But these, I like.

For the love of SHOES   MONA 2   Fall Boot Preview   Bakers Footwear {MOMA 2 Platform Pumps in Tan by Bakers – pinned to “For the love of SHOES”}

For pretty much no reason at all, for years I have been saving every cork from every wine bottle we’ve opened in our house. Now I have an idea of what to do with them.

DIY that I have got to TRY   DIY Decor   Artwork From Wine Corks   The New Home Ec {Wine Cork Fine Art Tutorial on the new home ec – pinned to “DIY that I have got to TRY”}

I’m on the fence. I can’t decide if I like these paper false eyelashes or not. What occasion exactly would these be appropriate for?

All Things Beauty   Paper Eyelashes  Yay or Nay    Lash Card Blog {Paperself Paper False Eyelashes on Lash Card – pinned to “All Things Beauty”}

What a great way to repurpose an old window!

DIY that I have got to TRY   diy project  etched map serving tray   Design Sponge {Etched Map Serving Tray Tutorial on Design*Sponge – pinned to “DIY that I have got to TRY”}

Rarely do I watch “The Bachelor” or “The Bachelorette”, but I did happen to see part of the last episode with the proposal. Man oh man! That ring she got could quite possibly be the most gorgeous thing I’ve ever seen.

Dream Wedding   See Bachelorette Ashley s Dazzling Engagement Ring {The Bachelorette’s Neil Lane Diamond and Platinum Ring on USmagazine.com – pinned to “Dream Wedding”}

Follow me on Pinterest!

Credit: All screen shots taken from Pinterest. MOMA 2 platform pumps by Bakers, wine cork fine art tutorial by the new home ec, paper false eyelashes by Paperself and featured on Lash Card, etched map serving tray tutorial by Design*Sponge, and Neil Lane diamond and platinum ring featured on “The Bachelorette” and USmagazine.com.

signature5

Thursday, July 28, 2011

Oh So Very Lovely Cake Pops!

What better way to resurrect a blog that has been lacking attention lately, than with Cake Pops!

Cake Pops

Cake Pops are relatively easy to make and have a certain “WOW” factor to them, it’s just a matter of mastering a technique that works for you. Working with melted chocolate is a skill.

CAKE POPS

What you need:

  • Box of chocolate cake mix (plus ingredients required by the box’s instructions)
  • Can of ready-made chocolate frosting
  • Lollipop sticks
  • Semi-sweet chocolate chips (2 bags)
  • Sprinkles

Notes:

You can substitute the chocolate cake mix and chocolate frosting with whatever flavor tickles your fancy. I found my lollipop sticks at Michael’s Arts & Crafts and a package of the shorter size was relatively affordable for 50 sticks. You could use your imagination though and use other items in place of the sticks (i.e. sturdy straws, pretzel sticks, toothpicks will work in a pinch, etc.). The type of chocolate you use for dipping is a matter or personal preference too. For different colored cake pops you can go with white chocolate and add food coloring, or simply use colored baking chips. I start with one bag of chocolate, melt it, and have the second bag handy to add if I need more chocolate for dipping.

Instructions:

  1. BAKE the cake mix according to ingredients required and instructions on the box.
  2. COOL cake until about room temperature.
  3. BREAK up cake until it is broken into fine cake pieces. You don’t want any big chunks.
  4. In a bowl, ADD about half a can of ready-made frosting to cake crumbles. You are looking for a doughy consistency. Mix until frosting is worked throughout and you have an even texture.
  5. FORM into balls (about 1 1/2 tablespoons in size).
  6. PLACE cake balls onto a wax paper or Silpat-lined baking sheet and FREEZE for about 5 minutes.
  7. ADD lollipop sticks.
  8. FREEZE for about 10 minutes (just to make the pops more manageable for dipping in the melted chocolate).
  9. In the meantime, start to MELT your chocolate chips. A double-boiler is the way to go and will ensure you do not scorch your chocolate giving you more time to dip without feeling rushed.
  10. DIP your pops in the melted chocolate. I have found that using a spoon and pouring the chocolate onto the pops works best for me.
  11. Lightly SHAKE off excess chocolate and DECORATE with your choice of sprinkles before replacing the pop back on the lined baking sheet.
  12. After all pops have been dipped and decorated, put pops back in the freezer for about 20 minutes so chocolate can set. Then you can feel freeze to package them however you’d like. If you are going to put them into a tupperware, it’s best to line between the layers with waxed paper.

I made these one day for a pot luck for work…work, is why I have not been paying nearly enough attention to this blog lately. A full-time position took me away from my daily blogging. But alas, it was only a temporary position and I am back again searching for that ever-elusive dream job.

As I was saying, I made these for a pot luck and they were a hit. I mean, who doesn’t want to eat a cake pop. Am I right or am I right? I also made some Peeps Pops for the same pot luck, but I will post that recipe at another time. You’ll want to make those for sure because they are complete and utter deliciousness, so keep an eye out for that upcoming post.

Credit: Photo taken by me.  Pops pictured in the photo were made by me as well.  Recipe adapted from Love From The Oven.

Glad to be back!

signature5

Friday, December 3, 2010

Just listed in my Etsy shop!

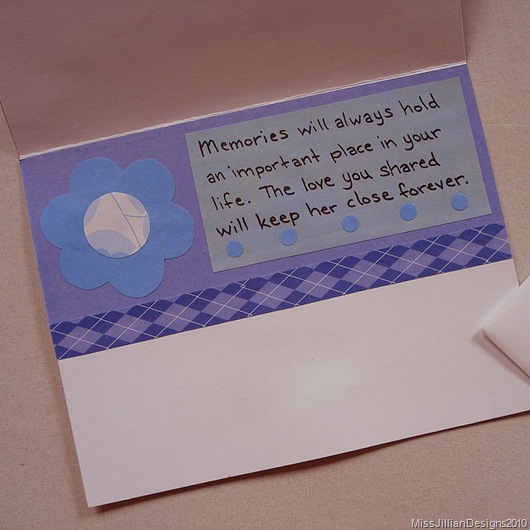
This Thinking of You Sympathy Card has just been listed in my Etsy shop.  Photos and a link to the listing is below.

Sympathy Card - Thinking of You - Front Sympathy Card - Thinking of You - Inside 

Listing for Thinking of You Sympathy Card on Etsy found here.

Credit: Photos taken by me.  Sympathy card hand made by me as well.

signature5

Thursday, December 2, 2010

Just listed in my Etsy shop!

In addition to some sweet little felt barrettes, I just listed a birthday card in my Etsy shop.  Photos and a link to the listing is below.  Enjoy!

Hedgehog Queen Birthday Card - Front

Hedgehog Queen Birthday Card - Inside 

Listing for Hedgehog Queen Birthday Card on Etsy found here.

Credit: Photos taken by me.  Birthday card hand made by me as well.

signature5

Just listed in my Etsy shop!

I just listed some stuffed felt barrettes in my Etsy shop. Here are some photos and links to the listings. Hope you like them!

Stuffed Cupcake Barrette

Listing for Sweet & Adorable Stuffed Felt CUPCAKE Barrette on Etsy found here.

Stuffed Goldfish Barrette

Listing for Bright & Sparkly Stuffed Felt GOLDFISH Barrette on Etsy found here.

Stuffed "Love" Barrette

Listing for Charming & Cute Stuffed LOVE Heart Barrette on Etsy found here.

Credit: Photos taken by me. All barrettes hand made by me as well.

signature5

Thursday, October 28, 2010

Completed Stuffed “Love” Heart Barrette

Today I made a Stuffed “Love” Heart Barrette.  It’s stuffed with fiberfill, stitched with the word “love,” and decorated with white iridescent bugle beads to for a little added sparkle.

I hope you guys like it!

I’m thinking about making a variation of this in a ornament (a similar heart in a larger size).  What do you think?

Stuffed "Love" Heart Barrette

Once I get this Stuffed “Love” Heart Barrette packaged nicely, I’ll be adding it to my Etsy shop.  I’ll let you know with another post when that happens.

You can see more photos on my Facebook page if you are interested.

Credit: Photo taken by me.  Photo editing by me using Photoshop.  Felt heart sewn by me as well.

signature5

Wednesday, October 27, 2010

Completed Stuffed Goldfish Barrette

Yesterday I posted about a Stuffed Goldfish Barrette I was working on (you can see that post here).  It’s stuffed with fiberfill and I added some white iridescent bugle beads to the barrette base for a little sparkle.

Today I finished making the Stuffed Goldfish Barrette with assistance of my friend Jessica who suggested the base color of blue (like water).  Thank you Jessica!  I really appreciate your input and I think blue was a great choice with the bright orange goldfish.

The little fishy barrette turned out really sweet.  I hope you guys like it!

Stuffed Goldfish Barrette

Once I get this Stuffed Goldfish Barrette packaged nicely, I’ll be adding it to my Etsy shop.  I’ll let you know with another post when that happens.

Credit: Photo taken by me.  Photo editing by me using Photoshop.  Felt goldfish sewn by me as well.

signature5

Tuesday, October 26, 2010

Stuffed Goldfish Barrette

Today I spent some time working on another felt barrette.  This time I’m making a goldfish that’s stuffed with fiberfill and complete with googly eyes.

I still have some work to do.  While I finished the goldfish, I still need to sew some felt around the barrette and attach it to the little fishy.

Once again, I’m throwing a question out to you guys…any ideas on what color I should go with for the barrette base?  So far I’ve gotten two great suggestions: (1) green like seaweed and (2) blue like water.  Both ideas are great, but I think I’m gravitating toward blue because I think it will look nice with the orange and I can add some of my white iridescent bugle beads to the base for a little sparkle (a la bubbles).

What do you think?  Is blue the way to go?  What do you think about adding a little bling with bugle beads on the base?  Is it going too far?  Any suggestions would be greatly appreciated!

Stuffed Goldfish Barrette

Credit: Photo taken by me.  Photo editing by me using Photoshop.  Felt goldfish sewn by me as well.

signature5

Completed Stuffed Cupcake Barrette

Yesterday I posted about a Stuffed Cupcake Barrette I was working on (you can see that post here).  It’s stuffed with fiberfill and sprinkled with some white iridescent bugle beads.

Today I finished making the Stuffed Cupcake Barrette with assistance of some wonderful helpers who suggested the base color of brown.  Thank you to my helpers!  I really appreciate your input.

I think the barrette turned out really cute!  It really exceeded my expectations.  And love how the brown looks with the pink and blue cupcake.  What do you think?

Stuffed Cupcake Barrette

Once I get this Stuffed Cupcake Barrette packaged nicely, I’ll be adding it to my Etsy shop.  I’ll let you know with another post when that happens.

Credit: Photo taken by me.  Photo editing by me using Photoshop.  Felt cupcake sewn by me as well.

signature5

Monday, October 25, 2010

Stuffed Cupcake Barrette

Today I spent some time working on a felt cupcake barrette.  It’s stuffed with fiberfill and sprinkled with some white iridescent bugle beads.

I still have some work to do.  While I finished the cupcake, I still need to sew some felt around the barrette and attach it to the little cupcake.

Any ideas on what color I should do for the barrette base?  I was thinking hot pink, but I have white, black, a few shades of blue, a few shades of purple, orange, yellow, brown, and red.  See this post and this post for more colors.  Any suggestions would be greatly appreciated!

Stuffed Cupcake Barrette

Credit: Photo taken by me.  Photo editing by me using Photoshop.  Felt cupcake sewn by me as well.

signature5

Wednesday, August 11, 2010

Out of the Box.

One reason I don’t really paint anymore is that it is such a hassle to pull my paints and other supplies out of storage.

I like to believe, if I had more room to organize my supplies out in the open, I would paint and sketch more often.

The only reason I make my cards on a consistent basis is that I leave all my supplies out on the living room floor. Luckily this bad habit doesn’t seem to bother my boyfriend.

Today, for the second time in a week, my giant blue Rubbermaid art storage container was pulled out of the closet. All in the name of a silly DIY project I’m working on just for fun.

DSC08946

Here are some of the goodies that emerged from their longtime home in Rubbermaid-land.

DSC08947

Credit: All photos taken by myself.

signature

Wednesday, July 21, 2010

Who Wants a Piece of Diaper Cake?

While I was home in Wisconsin last month, my mom helped me with a handful of Bachelorette party projects. Those pictures are still to come in an upcoming post, by the way. After those projects were done-finished-finito, I got to help her with one she was working on…a diaper cake for my sister’s shower!

Finished diaper cake - for a girl

I have to say, I was pretty excited when she called saying she wanted my help. It may sound silly, but I have a newfound infatuation with all things DIY, and have been wanting to learn how to make a diaper cake for quite awhile now.

When I arrived, my mom was prepared. She had supplies, tutorial videos to watch, and had already rolled most of the diapers.

My niece Riley with some of the supplies

WHAT YOU WILL NEED:

  • 84 diapers
  • 14-inch circular tray or piece of cardboard
  • ribbon that is at least 1 inch wide, you will need enough length to wrap around each tier
  • 84 regular rubber bands
  • 7 extra-long rubber bands
  • 2 dowels (approximately 12 inches long)
  • Decorations (for example: baby socks, toys, bottles)
  • Hot glue

*Be sure to check out the bottom of this post for additional notes.

The whole construction process of a diaper cake is pretty self-explanatory. Start by rolling up all 84 diapers. We rolled from the bottom (of each diaper) to the top. Fasten the rolled diaper with a rubber band.

Pack of 84 diapers

Once all your diapers are rolled, you can start bunching them up into the necessary circle shape. On a flat surface, put 1 rolled diaper upright. Then gather 7 more diapers around that to form another ring of diapers. Fasten this with one of the extra-long rubber bands. What you have, should look like this (the top tier):

Top tier - 8 diapers

1 + 7 = 8

Onto the middle tier. Once again, on a flat surface, put 1 rolled diaper upright. Then gather 6 more diapers around that to form another ring of diapers. Fasten with an extra-long rubber band. Around that ring, gather 12 more diapers and fasten with an extra-long rubber band. What you have, should look like this:

Middle tier - 19 diapers

1 + 6 + 12 = 19

Next is the bottom tier. On your 14-inch tray or cardboard circle, put 1 rolled diaper upright (in the photo below, disregard the bottle in the middle, which we replaced with a diaper). Then gather 6 more diapers around that to form another ring of diapers. Fasten with an extra-long rubber band. Around that ring, gather 11 more diapers and fasten with an extra-long rubber band. Around that ring, gather 17 more diapers and fasten with an extra-long rubber band. And finally, around that ring, gather 22 more diapers and fasten with an extra-long rubber band. What you have, should look like this:

Bottom tier - 57 diapers

1 + 6 + 11 + 17 + 22 = 57

Stack the middle tier on top of the bottom tier. Then stack the top tier on top of the middle tier. What you have should be starting to resemble a tiered cake. Stick the dowels through the top tier (on either side of the center diaper), down until you hit the base tray/cardboard. This should stabilize the diaper cake and make it much easier to move.

Dowel we used, next to broken rulerMy niece Riley with the stacked tiers

8 + 19 + 57 = 84

Now onto the fun part – DECORATING!!! My mom and I were pretty minimal with our decoration, but you can go all out. We started by adding a rattler/squeaker to the top of the cake, which we squeezed into the diaper at the top-center. Then we followed up by wrapping each layer with ribbon to cover the rubber bands.

For the ribbon, you will want to unroll some and determine exactly how much you need for each tier. Leave a little extra when you cut – maybe half an inch or so. Wrap the length of ribbon around the tier. Position the ribbon so it is covering the rubber bands and pretty straight (does not have to be perfect at this point since you can readjust a little after). Fold one end of the ribbon over so that the edge will be clean, and hot glue to the other end of the ribbon. Be sure it is tight around the tier. When the hot glue cools, you can readjust the ribbon band and make sure it is straight.

Continue the same process with the ribbon on each tier.

Diaper cake with ribbon affixed

My mom and I also made little roses out of baby socks for decoration on each tier. Aren’t they adorable? Click here to see Purplemtn7’s video tutorial via YouTube where my mom found this super cute idea.

Pink baby sock rosettePink & white baby sock rosette

We placed the little baby sock rosettes around each tier of the diaper cake and stuffed them into the diapers below to get them to stay put.

Finally, here is the finished product. A diaper cake for a baby girl.

Finished diaper cake - for girl

And in action as the table centerpiece at my sister’s baby shower. Complete with cute favors around it that my mom made.

Diaper cake as baby shower centerpiece

As I mentioned above, my mom also made some cute little favors – baby booties made from styrofoam cups. She found a video here by yoyomax12 via YouTube, but ended up recreating these instead using ribbon and hot glue.

Styrofoam baby bootie favor

In addition to that, she made a really awesome baby carriage from a watermelon. She found a video here by EatAllAboutIt via YouTube.

Watermelon baby carriageWatermelon baby carriage

NOTES:

  • Diapers:
    • We used Pampers Swadlers New Baby 84-pack in size 2.
    • Diapers with little-to-no patterns on them are the best.
    • Do not get diapers that have the cut out for the umbilical cord. They will not roll properly.
    • Items such as onesies, bibs, and bottles can be used in place of diapers in the cake.
  • Tray/Cardboard:
    • This is for a base for the diaper cake. Without this, the diaper cake will be impossible to move.
  • Ribbon:
    • Do not use sheer ribbon because it will not cover/hide the rubber bands.
  • Rubber Bands:
    • Buy extra, because at least a handful of the regular size ones will break.
  • Dowels:
    • For stability when moving the diaper cake.
    • Could try a handful of chopsticks as an alternative since those are readily available.
  • Decoration:
    • We used minimal decoration for the diaper cake my mom and I made. Just a Garanimals rattle/sqeaker (available at Wal-mart for $2) at the top, baby socks made into flowers, and ribbon.
    • Items such as onesies, bibs, and bottles can be used as decoration too.

Credit: All photos taken by me. Styrofoam baby bootie video by yoyomax12 via YouTube. Stryofoam baby booties via Creative Baby Shower Ideas. Watermelon baby carriage video by EatAllAboutIt via YouTube.


signature